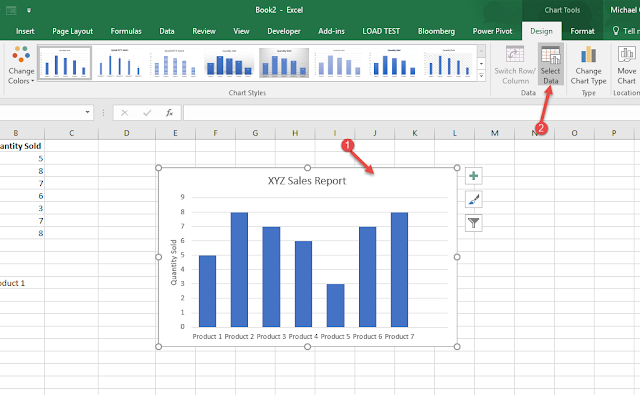
Well, what you need to create is a dynamic list (proper term is range, but let's go one with the easy fathom "list").
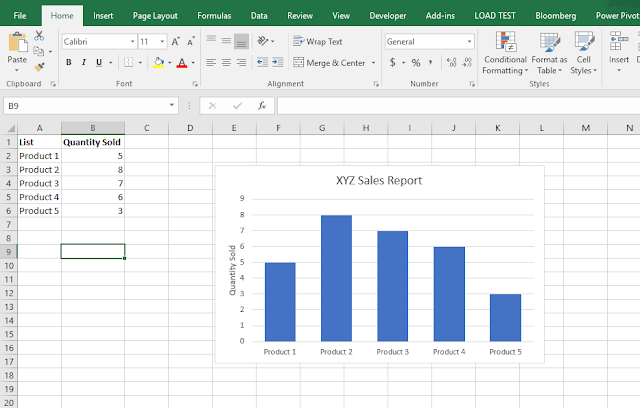
It turns this
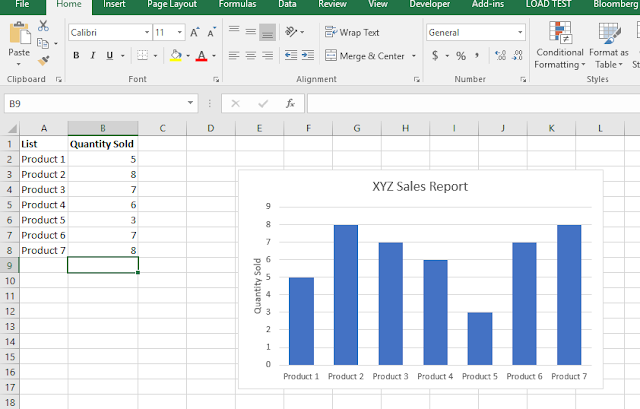
To this (without you re-making the chart or even touching the chart at all)
And can add life sweetening spice to your Data Validation lists.
Just think of all the magic that would do in some of your reports.
So how do you create these dynamic lists?
Easy. There are two popular ways to create dynamic lists in Excel. One is to use INDEX and COUNTA. The other is to use OFFSET and COUNTA.
Technically, you should choose the INDEX + COUNTA one over OFFSET + COUNTA one as it has better performance. Again, remember the keyword -- technically. Practically, the one you find easier to master is better.
INDEX + COUNTA
For the chart one, I used the INDEX + COUNTA one.
For the list field I created a named range:
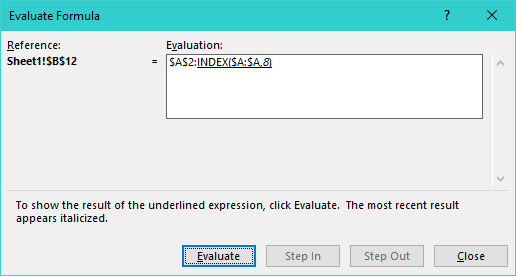
=Sheet1!$A$2:INDEX(Sheet1!$A:$A,COUNTA(Sheet1!$A:$A))
At the core, it is
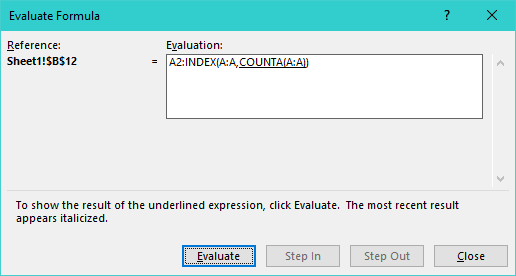
=A2:INDEX(A:A,COUNTA(A:A))
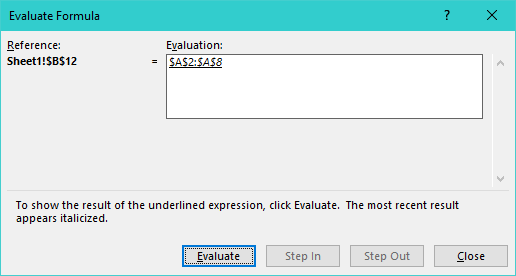
What the index part does is to return the cell reference of the last row cell in column A that is populated.
INDEX(A:A represents a list/array of all the cells in column A while COUNTA(A:A) part instructs Excel to locate the cell in the row position equal to the count of all filled cells in column A.
Now you get how it works.
OFFSET + COUNTA
For the Data Validation List, I used OFFSET + COUNTA
The named range is
=OFFSET(Sheet2!$A$2,0,0,COUNTA(Sheet2!$A:$A)-1,1)
Again, at its core the formula is
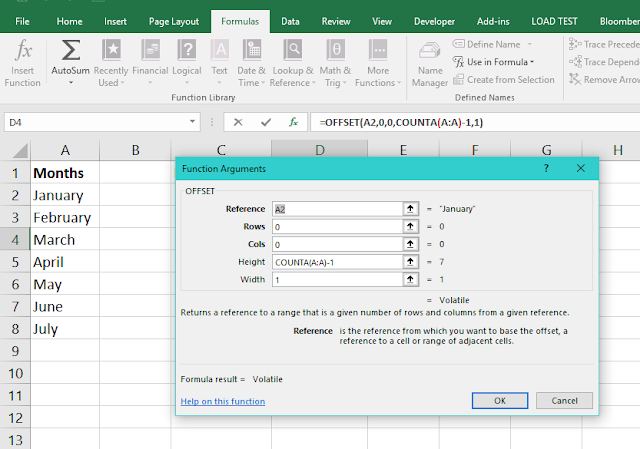
=OFFSET(A2,0,0,COUNTA(A:A)-1,1)
Easy to understand.
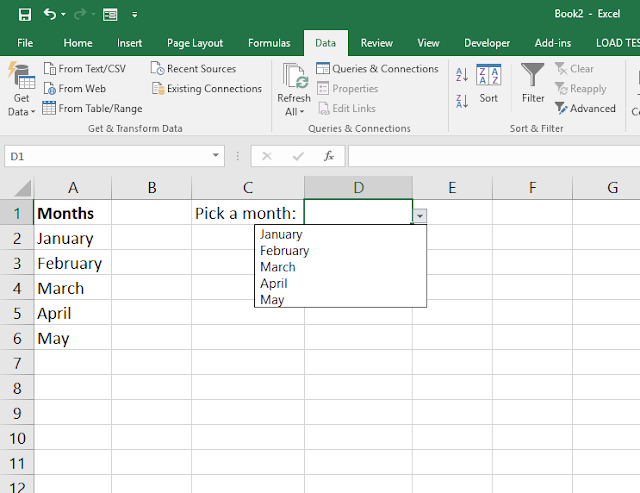
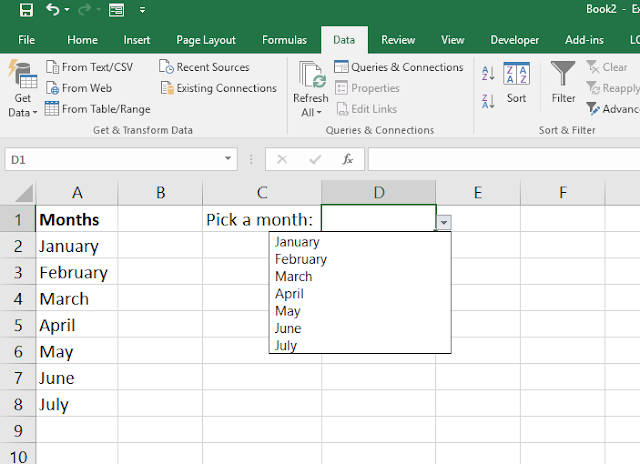
The result is
Finally
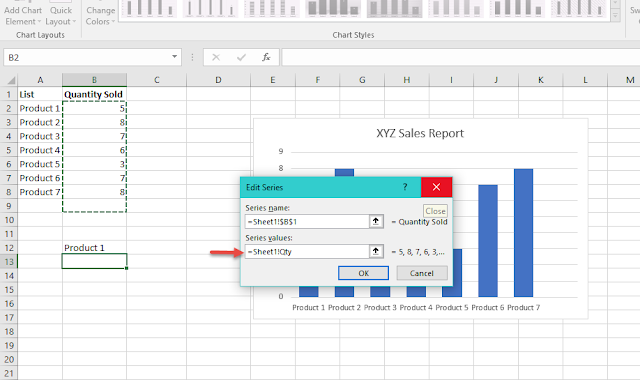
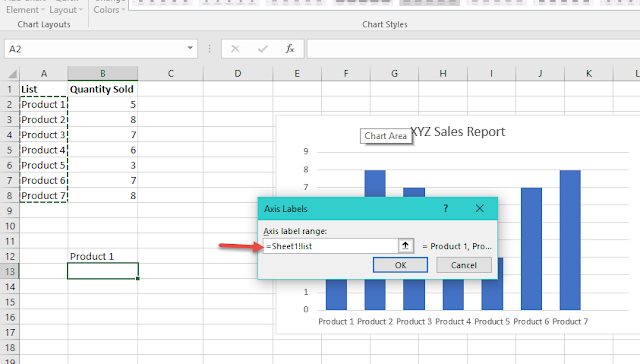
For the chart, I simply replaced the Legend Entries and Axis Label with the dynamic named range.
And that does the magic!
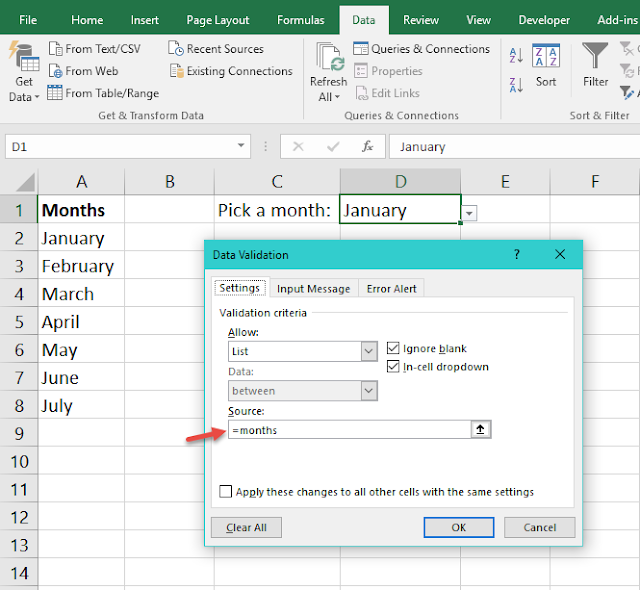
For the Data Validation List, I simply put =months as the source. (months is the named range I created with the OFFSET + COUNTA formula)
And that's all!
Now you should be a dynamic list guru :)

