
What if I tell you that you can create your own list. A list of states in Nigeria which you can autofill whenever you need to recreate them. Or a list of your products; you simply type the first two and drag to create the rest (autofill). It even helps you with sorting in the order you've created the list. This can be super useful for companies that use codes for aspects of their operations -- base station address code, branch code, product code and so on. Caution: The custom list has a quite limiting size limit.
So here is the example of how I created a custom list of states in Nigeria, arranged alphabetical order.
First, I have the states typed out in Excel, in the order I want it (alphabetical order).

And we are half-way done to having it permanently in Excel as an autofill-able list.
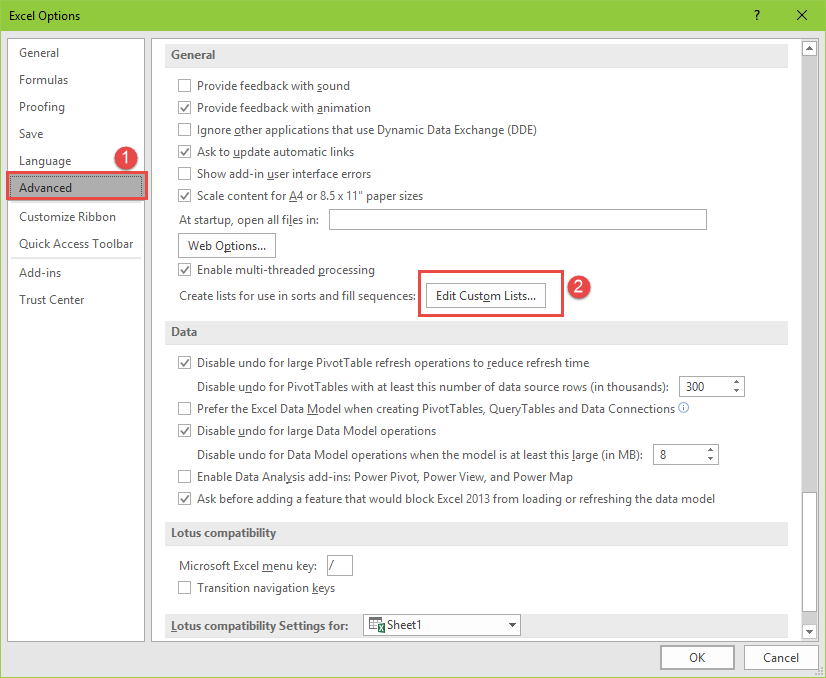
Go to File, Options, Advanced, and Edit Custom Lists.


In the Custom List Dialog box that comes up, import the list of states you already have typed into Excel.


And you are done.
Now in a new Excel file or Sheet, type in the first two states, select them and drag down. Excel will start autofilling the other states.


Congrats! Now you've created a custom list. No more typing out states in Nigeria, just type the first (or first two) and have Excel autofill the rest for you.
Thanks for sharing this article! I believe it will be incredibly useful to new bloggers, and I totally agree that internal linking is an easy way to boost your website’s performance.
ReplyDeleteaccounting payable
Thank you for sending me this story! I completely agree that adding links to your own pages is a simple method to improve your website's performance.
ReplyDeleteTap Road
A clear and practical walkthrough on creating custom lists in Excel, making repetitive data entry much more efficient. The explanation helps simplify a useful feature that often goes unnoticed but saves a lot of time. Great tip for improving everyday spreadsheet productivity.
ReplyDeletebrewery equipment auction
Great tutorial! The clear instructions and practical examples make creating custom lists in Excel easy to follow, even for beginners. Thanks for sharing a useful productivity tip that can save a lot of time. 👍
ReplyDeletefine wine store